Hello, the newbies of the woodworking world!
We know you are facing difficulties when you go to cut a taper using a table saw. And it’s true that it’s not easy work if you don’t know the proper guideline and instructions.
But don’t worry, we are here to solve your puzzles.
Professional, beginner, or DIY worker, whatever you are, if you work in the construction sector, then a table saw is one of the most regular tools you interact with. But many of us don’t know well about its operating and functional system.
And when it comes to the taper cutting, things get more complicated.
So, if you want to know about how to cut a taper on a table saw, read this guide for your query. We will try to cover here some useful instruction step by step for you.
Without waiting any longer, let’s start the article.
Things You Need – With Some Explanation
Cutting tapers not a hard task if you have the right tools for the work. With proper tools, you can make appropriate taper cuts for your next woodworking project.
Here we made a short list of necessary tools that you needed for cutting a tapper on a table saw. Also, we perceived the importance to describe in short why you need these tools. So, check the list below –
1/ Table Saw Taper Jig
The table saw taper jig is a necessary tool for cutting a taper on a table saw. You will need this tool for making subtle and difficult rip cuts securely.
2/ Blade
A good table saw blade makes your work easier than you think. So, it’s very essential to choose the correct blade for your work. We recommend Infinity Thin-Kerf cutting type Blade for cutting taper.
Especially for tapers, Thin-kerf and tooth enormity are the best combination for accurate and easy cuts.
3/ Clamp
This tool is used for security issues. You must need it when you mounting the work pieces during the cutting of taper.
4/ Pencil
Yeah, you will need this tinny but very important tool when the time comes to measurement. You need to make a perfect line on the plywood for accurate cutting. Use a pencil to do this work.
5/ Mount Block
During the cutting time, a good position of the taper is very important. A mount block tool is generally used for this job.
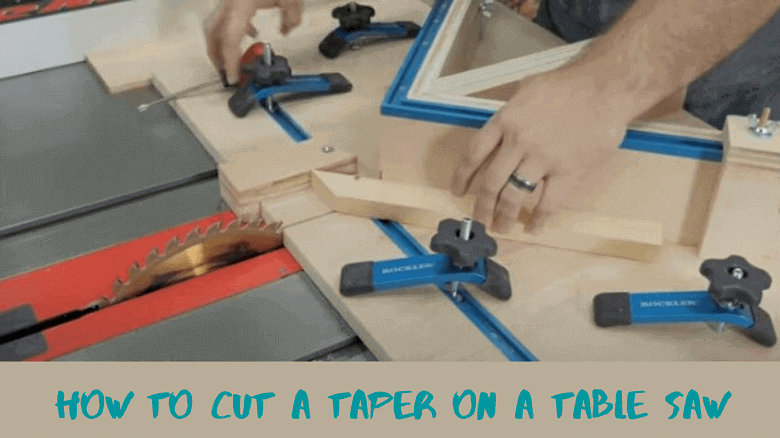
How To Cut A Taper On A Table Saw – Step By Step Guide
Here are the necessary steps you need to follow to do your work. Let’s started.
Use A Pencil To Draw The Line
When you want to build any furniture, you need to make tapered cuts. And for a tapered cut, perfect measurement is essential.
So, at first use the pencil to draw a straight line to illustrate the cutting trail of the two sides of the taper. After drawing the line, you can see the materials adjusted from the cut area on the right and the finished part will on the left side.
Put Up A Guide Board
You need a guide board for cutting a taper on a table saw. The most usual and ideal boards that are used for this work are plywood or wide plain board. Also, you can use sheet material for the same work.
Always ensure that whatever material you use, that is firm enough to avoid the chance of breaking.
Keep in mind that, the board must be long enough to reach both sides of the taper blank. Settle the board while leveling with the kerfs line you drew. Don’t forget to use screws or pins to secure the guide board onto the discard.
You can use an air nailer to screw up the board with the discard.
Set The Fence
Flick the board over end to end. Make sure that the guide board is correctly set in position with the table saw fence.
Choose A Good Stock Block
You must need to attach a quality stock block to the jig that is correctly positioned against the table leg.
Here, we want to give you a small advice bro. That is, when you finding a particular stock block for your work, always ensure that the block will exactly fit with the taper jig. Otherwise, you will face serious difficulties during the taper cutting time.
Make Two Mount Block
Here, you need to make two identical mount blocks that are same in thickness and diameter as the table leg.
Fix the block behind the support to ensure the block doesn’t sprain and must be intimate to the end of the leg.
Screw The Clamp
After setting the mounting blocks, screw the toggle clamps into the blocks.
Take your time to finish this section. When you have done it perfectly, you will have a good taper jig that is ready to use.
Preparation Of Cutting
We reach almost end part of our job. After setting the table saw fence, your next step is, take preparation for cutting the taper.
Simply place the jig on the table saw. Lift up the table saw blade to set the teeth not less than a quarter inches over the leg’s upper part.
Start The Cutting Process
We are ready to begin cutting.
The method we are gonna apply here is also popular for easily cut any custom pedal board. It’s a straightforward, effortless and safe cutting method.
Just remove the guide board before starting the saw and cut your pre-planned parts. Cut it very carefully that the sides of the jigs will align with one another and the end area will be squared.
After cutting the taper parts, the ready part falls off on to the work table. You can recycle all the cutting waste except the two pinholes.
Finished! It’s too easy than you imagine.
Wrap Up
Okay, here are some simple steps that anyone can follow to cut a taper on a table saw. It’s an easy task if you are serious about what you are doing.
We hope this article will helpful for you to make your tapering easier.
TIA!
Relevant Pages:
- Different types of table saw on the market
- How to cut 45-degree angle with the table saw
- What is a table saw used for?
- How to cut angle with the table saw
- Dewalt dw745 review for 2020

This is me Sonnet. I manage a full-time workshop for my clients’ woodworking projects. From a very young age, I’ve been always passionate about DIY projects. And that’s the reason I’m amicable with the woodworking tools. I’m regularly handling a couple of projects like cabinets, furniture, boats, and many more using wood, veneers, and laminates.