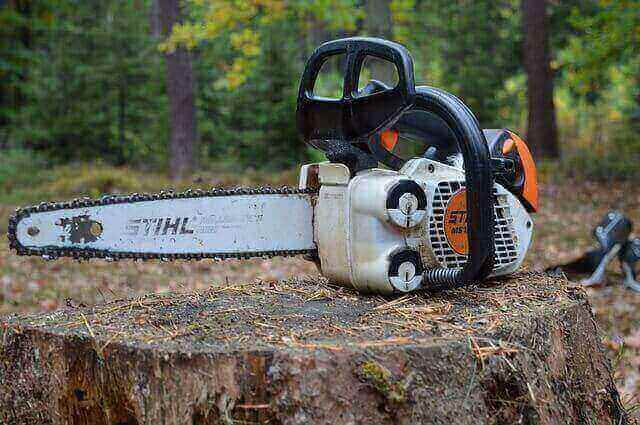
A chainsaw is a handy tool to use. Over time, the chain can get damaged, which will decrease the level of the performance of your chainsaw. It is the time when you will need to replace the chain on your chainsaw. You can always look for a professional to do it for you. But you can do it on your own if you know how to replace the chainsaw chain.
It will not only save your money but will also save you time. By using some of the household tools, you can easily accomplish your goal of replacing the chainsaw chain. This article will enlighten you about the procedure of doing it. We can divide the entire process into three main sections.
Types of equipment you will require:
- Hand gloves.
- Flathead screwdriver.
- Wrench
Now let us zoom into each section of replacing chainsaw’s chain –
Section one – Get rid of the old chain
In the beginning, you have to remove the old chain to replace it with the new one. Wear hand gloves as protection. Make sure to unplug the chain saw before starting your work.
- Unlocking chainsaw brake: If your chainsaw has a break attached to its side plate, make sure to disengage it by pulling the front handle backward. Else it can make your task of reinstalling difficult.
- Removing the side cover: Next, you will have to dislocate the tensioning screws. You can find this on the side plate or the inside of the guide bar. Use a screwdriver to turn the head of the screws in a counter-clockwise direction to loosen it. Make sure to remove them entirely. Then remove the side cover and place it aside.
- Releasing the chain tension: After removing the side cover, the bar of the chain saw, and the clutch drum will be visible to you. The chain is wrapped around the sprocket, which can be found behind the clutch drum. Grip the guide bar between your thumb and forefingers and pull it away from the chain saw.
- Removing the old chain itself: Now, you are ready to remove your early chain form the chain saw. Just hold the chain of the chainsaw and remove it. Set it aside on your table.
Section two – Installing the new chain.
Once you have removed the old chain, you are ready to replace a new one. It is a straightforward task to perform.
- Place the new chain: Now grab the new chain that you have bought and slide it around the clutch drum and the blade. Make sure that it engages into the sprocket. The drive links of the chain should face forward and grip the guide bar, not the cutting teeth. Else your chainsaw would not be able to cut anything. Use your fingers to wrap it around the nose and the body of your chainsaw’s guide bar.
- Adjusting the guide bar: Once you are done with the previous step, it is time to align the guide bar. Use your thumb and forefinger to pull the nose of the guide bar away from the chainsaw. It is a way of putting some tension into it.
- Put the side plate back to its position: Now replace the side cover and put the nuts back in their prior place. Do not adjust it very tightly. Use your fingers for the adjustment right now as you will be able to readjust the tension later.
- Adjusting the correct tension: To improve the tension on the chain, you can use the tensioning screw on the side of the guide bar. You can pull the chain lightly away from the bar to check the adjustment. Do not make it too tight or too loose. Make sure that your chainsaw’s chain is not hanging in the bottom section. If it does, it is too loose, and you will need to readjust it to make it more tightened.
- Tightening the nuts: The final step is tightening the nuts. Use a socket wrench to do this job. Move the heads of the nuts in a clockwise motion. Lift the nose of the bar while doing it to make a perfect adjustment.
Section three – Testing
Once you are done with replacing the new chain, it is time to give it a check. Please turn it on and run it for a few seconds to check whether it runs smoothly or not. Please turn it off and recheck the chain again. Then try to cut something with it. It should be working fine. If you need to put any additional force, be sure that there is something not right. If so, then repeat the process again to avoid any unwanted accidents. That is all. Now you know all the steps of how to replace the chainsaw chains.
Tips
There are many types of chainsaw available in the market. But not all of them can be used for every kind of chainsaw. Be careful about the pitch, gauge, and drive links. Make sure that these factors match the specification of your tool. If this is your first time purchasing a chainsaw, find one for which you can replace the chain quickly. There are many models available, starting from a high price range. Do your research and find a suitable budget chain saw for yourself. If you are doing this task for the first time, it would be wiser to keep somebody expert around you to guide you.
Final thoughts
The cutting chain is a vital component of a chainsaw. A milling chainsaw is a must-have item to accomplish various types of tasks. Replacing the chain of a chainsaw might seem complicated at the beginning. But it is not, once you know all the steps of how to replace the chainsaw chain. Just keep the steps mentioned above on your mind and follow them carefully. You will easily able to do that by yourself.
Related Articles :
- Read our buying guide for milling chainsaw
- Tips and tricks of chainsaw for beginners
- How to Split Firewood with a Chainsaw
This is me Sonnet. I manage a full-time workshop for my clients’ woodworking projects. From a very young age, I’ve been always passionate about DIY projects. And that’s the reason I’m amicable with the woodworking tools. I’m regularly handling a couple of projects like cabinets, furniture, boats, and many more using wood, veneers, and laminates.