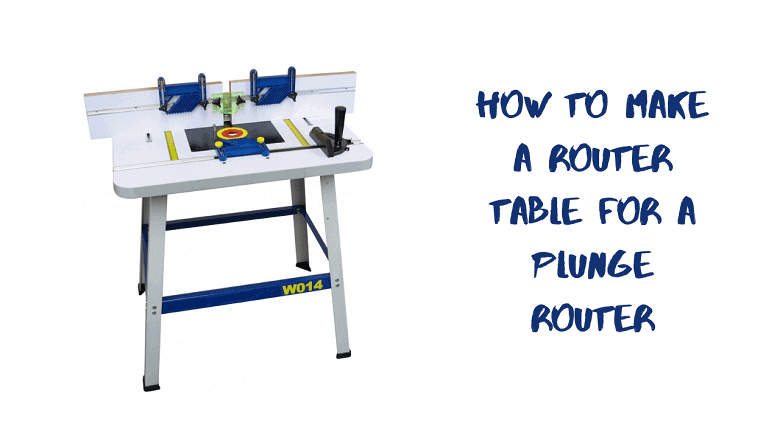
To mount a plunge router. It is necessary to learn about how to make a router table for a plunge router. A base router table will keep your plunge and you safe from unexpected injuries.
A plunge router is a heavyweight and powerful drill type machine. That one can use to make a hole into the wood, make a design, engrave pattern styles, mortise bits, cut into dices, or different sizes.
It is a strong motor house gadget that spins very swiftly up and down to finish the project or design.

Therefore, you can do your works and projects on that router table very fluently Also, with a router table you can do multiple tasks without any extra preparations and tasks.
As well, table router can also be a risky tool. If you create it with a lot of errors. Now, we will show you the whole process to make a perfect error less router table for a plunge router.
How to Make a Router Table for a Plunge Router – Simple Methods
Before we start to make a router table. We should know about some important things about the router table and the plunge router.
The plunge router is a very strong router machine. If you are not careful enough, it can also occur you with some severe damage. Such as mesh up your hand bones or other materials near it. So you always have to be very careful when you work with this tool.
Moreover, you can decrease the possibility of the damage or injury this machine can cause with the router table.
You can buy the router table but it can be very expensive. Also, it may be a big waste since you are a beginner and you are bound to mess up. We can just make ourselves easily.
Therefore to create a router table we will need some equipment, materials, tools, and supplements.
Things We Will Need to Make a Router Table – Essential Materials
To create a decent and well enough table router. There necessary items, things you will require.
Such as:
- The plunge router with a sideways edge guide.
- You need a parallel router bit of 1/2” or similar to the straight ones.
- The V-groove router bit shallow.
- A hand drill machine.
- At the minimum two carriage bolts or coach bolts. Also two fender washers or penny washers.
- Wingnuts or butterfly nuts to attach the bolts.
- The hole saw or cutter.
- A few 3/4” scrap plywood.
- The whole pencil box.
- Some hoes tie or a zip tie. It’s better to have more than one.
- A vise clamp and a clamp or clasp to hold metal and wood.
- And a circular saw kit to shape up the scrap plywood in a proper size.
Now that we have all the necessary things we will need to use for making a mount table router.
Step by Step Guidelines to Make a Router Table for a Plunge Router
So, let’s proceed and go through all of the steps and make your own table router. Though the process is easy you have to be careful to make it flawless. So, let’s go through the process.
- First, use the circular saw and cut down the plywood into a small square shape that fits for the plunge router. Also, while you cut the plywood draw mark outlines and cut some of the plywoods. So, you can use them for clasp or clamps pieces.
- Then, you have to place the router plunge on the plyboard and lookout exactly where it places well fit. Then again draw out and mark points and lines on the board. You can use a calk, marker, pencils for that.
- Then cut the places you marked out earlier. Trim the slots of it and clamp blocks to hold it in. Therefore, be very cautious when you measure and cut it. Because if you make a mistake then you have to start over again.
- Other, than to clamp the router with the plywood. It will be more secure to deeply recess the plunge router into the plyboard. To do that, cut off all sideways edge guide bars out of the router. This will support to stop the plunge router from gliding off. As it strengthens the clasp of the router.
- Then drill the plywood with a hole saw and make a hole into it to make the recess. After this, place the router into it and fit it in. You need to use the router with barrier bars and now add up V- Groove router bits shallow in the plyboard to set the bars to the center.
- So, now crop off all the Groves that are similar in the clasp blocks. On the bars, the screw bolts are bigger than the barrier bars. So, either you can take out the bolts before you use mount or create another recess on the groove ends.
- Now, organize the V – grooves and the clamp blocks in the board and clasp these down where it will not block or interfere with the footplate of the plunge router. Then drill into the clasp block through the mount board bit bolts.
- Further, use two-bolt screws per one clasp to have a better grasp or grip in every bar at the two ends of the groove. Well, you can also use one screw bolt per one clamp, for that you have to hook the bolt into the center.
- To mount the board. First, recess the bolts into the top plyboard. When it is complete, fit in the coach bolts, drill in to screw it tightly. It will make the clamps blocks on the router tighter. On the square part of the base, it will drill a hole out and stop the drill head.
- Use the fender washer to hold the plywood firmly from the beneath the butterfly nuts. So it will avoid the plyboard to tear down when you tighten the ply. Finally, clasp the mount down then run some works to test if it works well.
At last, you have your own router table. With this, you can do all the projects and tasks fluently and easily.
Final Words:
A router table is very helpful and an important material for your Plunge Router. You can buy it, but it can be very expensive.
However, you can make a quality router table for your Plunge Router very fast and easily. That will take up some effort yours. But it will also save up a lot of expenses. As you can make do with a lot of items within your reach.

This is me Sonnet. I manage a full-time workshop for my clients’ woodworking projects. From a very young age, I’ve been always passionate about DIY projects. And that’s the reason I’m amicable with the woodworking tools. I’m regularly handling a couple of projects like cabinets, furniture, boats, and many more using wood, veneers, and laminates.